The Shocking Truth About Gel X Nail Removal That Salons Hide!
Have you ever wondered what really happens when you need to remove those beautiful Gel X nails? While salons make it seem like a simple process, the truth is far more complex than most people realize. Unlike traditional nail extensions that practically require a construction crew for removal, Gel X presents its own unique challenges—and opportunities—when it's time to say goodbye. In this comprehensive guide, we'll uncover everything you need to know about safely removing Gel X nails at home, the hidden costs of salon removal, and the expert tips that will protect your natural nails from damage.
Understanding Gel X Nails: The Basics
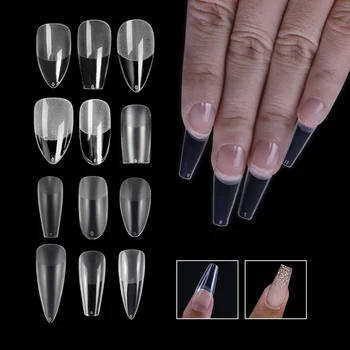
Before diving into removal methods, it's essential to understand what makes Gel X nails different from other nail enhancement systems. Gel X nails are a revolutionary nail extension system that uses pre-shaped gel tips applied with a specialized adhesive and cured under UV or LED light. This system has gained massive popularity because it offers a more natural look, longer-lasting wear, and a lighter feel compared to traditional acrylic or hard gel extensions.
The popularity of Gel X nails has skyrocketed in recent years, with many nail technicians reporting that these extensions can last anywhere from 2-4 weeks without lifting or chipping. However, this durability is precisely what makes removal such a crucial topic that salons often gloss over during the application process.
The Hidden Costs of Professional Removal
When you visit a salon for Gel X nail removal, you might be surprised to discover that the service can cost anywhere from $15 to $30—sometimes even more than the initial application itself. This pricing strategy has led many nail enthusiasts to seek alternative removal methods, but the process isn't as straightforward as simply peeling them off.
The shocking truth is that many salons rush through the removal process to maximize their daily client volume, potentially compromising the health of your natural nails. Some technicians may use aggressive filing techniques or soak-off methods that can thin your nail beds, leaving them vulnerable to breakage and infection.
Two Primary Methods for Removing Gel X Nails
There are two primary methods for removing Gel X nails, each with its own advantages and considerations. Understanding these methods will help you make an informed decision about whether to attempt at-home removal or seek professional assistance.
Method 1: The Soak-Off Technique
The soak-off method involves saturating cotton balls with acetone, placing them on each nail, and wrapping the fingers in foil to create a sealed environment. This process typically takes 15-20 minutes and allows the acetone to penetrate the gel layers, breaking down the adhesive bond.
Key advantages of the soak-off method:
- Less aggressive than filing
- More thorough removal of all gel layers
- Lower risk of nail thinning when done correctly
Method 2: The Gentle Filing Approach
The gentle filing method uses a coarse nail file to gradually break through the gel surface, followed by acetone application to dissolve the remaining layers. This method can be faster but requires more skill to avoid damaging the natural nail underneath.
Key advantages of the gentle filing approach:
- Can be completed more quickly
- Better for removing stubborn or thick applications
- Allows for more control over the removal process
How to Safely Remove Gel X Nails at Home Without Damaging Your Natural Nails
While a professional nail technician is always the best option, you can safely remove Gel X nails at home if you follow the instructions carefully. The key is patience and using the right tools and techniques to protect your natural nails.
Essential tools for at-home removal:
- 100% acetone nail polish remover
- Aluminum foil cut into 3x3 inch squares
- Cotton balls or pads
- Cuticle pusher or orangewood stick
- Coarse nail file (100-150 grit)
- Cuticle oil and hand cream for aftercare
Step-by-step removal process:
Preparation: Begin by gently filing the shiny top coat of your Gel X nails to break the seal. This step is crucial as it allows the acetone to penetrate more effectively.
Soaking: Saturate cotton balls with acetone and place them on each nail. Wrap each fingertip with foil, ensuring a tight seal. Let them soak for 15-20 minutes.
Gentle removal: After soaking, gently push the softened gel away from your natural nail using a cuticle pusher. Never force or pry—if the gel resists, rewrap and soak for an additional 5-10 minutes.
Final cleanup: Once all gel is removed, lightly buff any remaining residue and wash your hands thoroughly.
The Truth About Cost and Durability
Understanding the cost-benefit analysis of Gel X nails versus other extension methods is crucial for making informed decisions about your nail care routine. While Gel X nails typically cost between $50-$80 for a full set (compared to $40-$60 for traditional acrylics), their durability often justifies the higher price point.
Gel X nails generally last 2-3 weeks longer than traditional extensions, meaning fewer salon visits and potentially lower long-term costs. However, this extended wear time also means that when removal time comes, you're dealing with more product buildup, which can complicate the removal process.
Expert Tips to Protect Your Natural Nails
The shocking truth that many salons won't tell you is that improper removal is the primary cause of nail damage, not the Gel X product itself. Here are expert tips to ensure your natural nails remain healthy throughout the removal process:
Preparation is key: Never attempt to remove Gel X nails when they're already lifting or damaged. This increases the risk of tearing your natural nail.
Temperature matters: Warm acetone works more effectively than cold acetone. You can warm it slightly by placing the bottle in warm water for a few minutes before use.
Patience prevents damage: Rushing the removal process is the biggest mistake most people make. If the gel isn't coming off easily, it needs more soaking time.
Hydration is essential: The acetone drying effect can be severe, so keep your nails and cuticles well-moisturized throughout the process.
Best Aftercare Techniques to Keep Your Nails Healthy and Strong
Also, discover the best aftercare techniques to keep your nails healthy and strong after the removal process. Your nails will need special attention to recover from both the Gel X application and the removal process.
Immediate aftercare steps:
Deep hydration: Apply cuticle oil liberally to all nails and massage into the nail bed and surrounding skin. Repeat this process 2-3 times daily for the first week.
Strengthening treatments: Use a nail strengthener or hardener for the first 3-5 days after removal to help rebuild nail structure.
Gentle maintenance: Avoid harsh chemicals, excessive hand washing, or using your nails as tools during the recovery period.
Long-term nail health strategies:
- Take a break between nail enhancements to allow your natural nails to recover
- Consider nail supplements containing biotin, vitamin E, and other nutrients that promote nail health
- Keep nails trimmed short during the recovery period to prevent accidental breakage
Common Mistakes to Avoid During Gel X Removal
Understanding what not to do is just as important as knowing the correct removal process. Here are the most common mistakes that can lead to nail damage:
Never peel or pry: Attempting to remove Gel X nails by peeling or using tools to pry them off can cause severe damage to your nail plate, potentially leading to permanent thinning or ridges.
Avoid metal tools: Using metal cuticle pushers or other sharp instruments can scratch and damage your nail surface. Always opt for wooden or plastic tools.
Don't skip the filing step: Failing to break the top coat seal before soaking significantly reduces the effectiveness of acetone and extends the removal time.
Never use excessive force: If the gel isn't coming off easily, it needs more time in acetone, not more pressure from you.
When to Seek Professional Help
While at-home removal is possible, certain situations warrant professional assistance. Consider visiting a salon if:
- Your nails show signs of infection or severe damage
- You're dealing with multiple lifting or broken nails
- You have a history of weak or brittle nails
- You're unsure about any step in the removal process
- You've experienced nail damage from previous at-home removal attempts
Conclusion: Taking Control of Your Nail Health
The shocking truth about Gel X nail removal is that knowledge is power. Understanding the proper techniques, having the right tools, and following expert guidelines can mean the difference between healthy, beautiful nails and damaged, weakened nail beds. Whether you choose to remove your Gel X nails at home or seek professional help, being informed about the process ensures you'll make the best decisions for your nail health.
Remember that the goal isn't just to remove the gel—it's to preserve and protect your natural nails for future enhancements or to enjoy them in their natural state. By following the comprehensive guidelines outlined in this article, you can confidently approach Gel X nail removal knowing that you're taking the best possible care of your nails.
The beauty industry often prioritizes quick results over long-term nail health, but armed with this knowledge, you can make choices that benefit your nails both now and in the future. Your nails are worth the extra time and care—after all, healthy nails are the foundation of any beautiful manicure.

salon jaylee meets apres nail + gel-x nail extensions | Salon Jaylee
Private Label Gel X Nail Factory Wholesale False Nail Tips Clear Full

Gel x nails • Compare (42 products) at Klarna today

